| Introduction - Part 2
- Fir Trees
Making fir trees
is a little different from doing canopy style trees.
You'll
need the following texture files from either Ghost Recon
or Desert
Siege
M01_LODtreetest07B.rsb
M01_treetest07B.rsb
Creating a reference to work from.
Find
and load the texture files into two empty slots in the
material editor.
After
you load the M01_treetest07B.rsb file into the material
editor,
put
a check in the box for 2 sided in the shader basic parameters
rollout.
That
texture file has all the elements we'll need to texture
our high poly
model
and we want those textures to be visible from 2 sides.
The
LODtreetest rsb is the low lod texture which we're going
to use as
a
reference from which to build our model.
Let's
start by first saving this file and giving it a name that's
easy to recognize.
Choose
whatever you like.
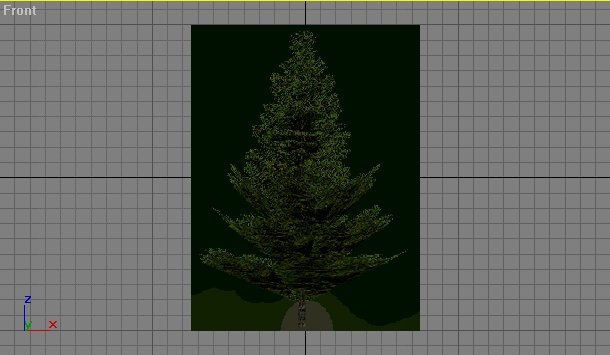
For
the reference object, create a plane in the front viewport.
Give
it a name. I chose the name "reference".
If
your plane is a wire frame, you'll want to hit F3(3dsm 4) to make the surface
visible.
Otherwise you won't be able to see your texture on it.
Make
the length 2m and the width 1.5m
Apply
the LODtreetest07B texture to the plane. Now we have a reference to work
from. Save.
Switch
to the perspective view port.
Hit
the zoom extents all button to give yourself some room
to work and also be able
to
see the whole reference object.
If
you find that part of your reference object is below the grid, simply move
it so that's
it's
bottom sits on the grid. Hit the zoom extents all button again if you needed
to reposition
your
reference object. This will again center your reference object.
The Trunk
Lets
make our trunk first.
Draw
a cylinder in the perspective viewport right in front
of the textured trunk in your
reference.
Give it a name. I named mine fir_trunk.
The
bottom of your trunk should be in line with the bottom
of your reference object.
If
it's not, adjust it so that it is.
One
of the best ways of doing this is with the align button.
With your trunk selected,
click
on the align button. Your cursor will change to a different shape. It's waiting
for
you
to pick the target to align with. When you move your cursor over the reference
object,
it will change to an X. When that happens, left click and that will choose
the
reference
object as the object to align with.
In
the align selection window that pops up, select "minimum" under current object
(your
trunk) and select minimum under target object (the reference object).
Under
the align position (world) check the Z position radio button to select
that axis.
Click "apply".
This aligns the bottom of the trunk with the bottom of the reference object.
With
the align selection window still open, select center under current object
and center
under
target object. Now select the X position to center the trunk with the center
of the
reference
object on the X axis. Click "apply". Click "ok".
Save.
With
your trunk still selected, click on the modifier tab to make some adjustments
to the
geometry.
Change the number of sides to 6, height segments to 3, height .8m and
radius .04.
Save.
It
should look something like this now.
Select
the trunk and convert to editable mesh.
Apply
a taper modifier and in the parameters rollout
enter
-0.3 for the amount.
Apply
an edit mesh modifier and save.
Open
the material editor and apply your M01_treetest07B.rsb
texture to
the trunk.
Apply
a UVW Map modifier. In the parameters rollout under mapping, select
cylindrical.
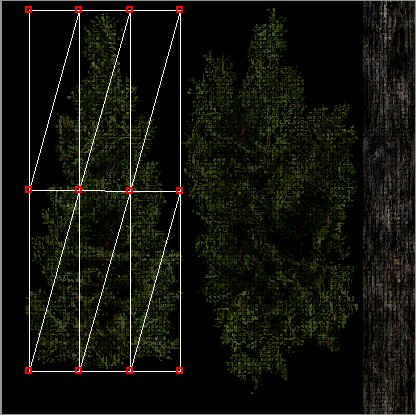
Now
apply an Unwrap UVW and click the edit button in the parameters rollout.
Select
all the UVW's and use the horizontal scale button to scale the white
box smaller
so
that it's width is about the same width as the trunk in your texture. Then
move the
UVW's
and position them so they cover the trunk texture. Use the vertical
scale button
to
scale the UVW's slightly smaller to make sure they don't exceed the boundaries
of
your
texture file. It should look like this.
Once
your done, deselect the uvw's and close the window. Save.
And
now your trunk should look like this.

Branches
Ok,
now the fun really begins.
Make
a cone next to your trunk.
Give
it a name like branch.
Use
the align button to align your cone's center on the xy axis with your trunks
center
on
the xy axis.
Use
the select and move button to raise your cone higher on the z axis. Raise
it up to
where's
it's bottom is lined up with the bottom of the first branch in your reference.
Save.
Click
on the modifier tab to change the size settings of your cone.
Change
radius 1 to .08, radius 2 to .765 and the height to .325.
Ok,
by now you should be starting to see where we're going with this.
You
should have something like this now.
So
far so good ? If not keep trying. If so, good.
Now
change the number of height segments to 1. Change the number of sides
to 6. Save.
We
have Branch1 done, now lets clone it to make a couple more. Do this by
selecting
your
cone, clicking the select and move button and moving it higher on the
z plane while
holding
down the shift key. Drag the copy of your cone upwards to where it's
lined up
with
the next higher branch of your reference. In the clone options dialog
box choose
copy
and number of copies 2.
Save.
With
your top branch selected, change radius 1 to .225, radius 2 to .525
and change the height
to
.35.
Now
select your middle branch and change radius 1 to .2, radius 2 to .625
and change the height
to
.315. Save.
You
should have something like this now.
Our
3 branches are done but you may want to go back and do a little tweaking at this
point.
I'll
leave that up to you. In my case, it looks like my branches could use a bit of
adjusting
but
it's close enough for me so I'm going to leave it as is.
Next
select your 3 branches and convert them to editable meshes. Select
a cone, click on the poly button to go into sub-object mode and then select
and delete
the
top and bottom Polys. Do this for each cone. We will only be using the sides
of the cones
for
this model. In some cases the bottom polys will be hidden from view by other
cones.
Simply
right click any cones that obstruct your view and select "hide selection" from
the menu
to
temporarily hide that object. Then right click again and choose "unhide
all" to make them
visible
again. Using F2 is very helpful here. It shows what poly's are selected by
shading them
in
red. Here you can see I have the top poly of the top cone selected.

Don't
forget to exit out of poly sub-object mode after deleting the top and bottom
polys
of
each cone. Also be careful not to select and delete any of the side polys. Use
the arc
rotate
button after selecting a poly to rotate your view around to the back side to
insure
no
side polys have been selected.
Save.
Select
a cone and apply your M01_treetest07B.rsb texture to it.
Now
apply a UVW Map modifier to it and choose "face" under the parameters
rollout.
Apply
an Unwrap UVW and click on the edit button to bring up the edit uvw's
window.
Select
the uvw's and scale the box smaller using the vertical and horizontal
scale buttons.
Position
it over the middle texture. It should look something like this. Save.
And
your branch should look something like this.
Now
repeat the same steps to texture the other two branches.
Once
your done you can go back and tweak them a bit more to get the look
you want. Now you should have something like this. Save.
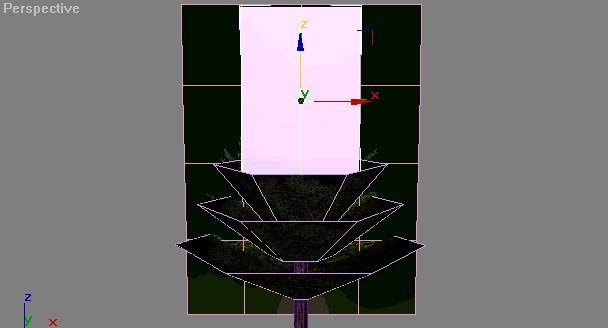
Now
we have to make the top of tree. For that we just draw out a plane
in the front
viewport.
Name it treetop or something like that. Switch back to the perspective
view.
Click
on the modify tab to change the size settings of the tree top object.
Change
the length segments to 2. Change the width segments to 2.
Change
the length to 1.1m and the width to .7m.
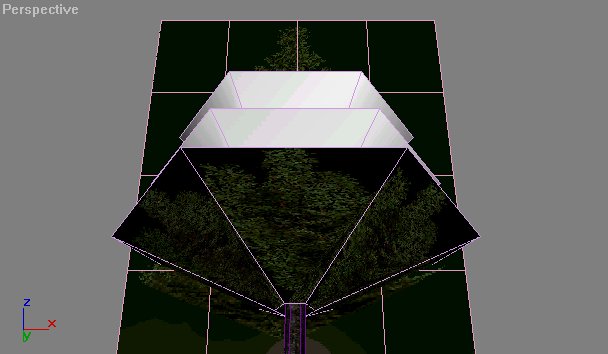
Align
the treetop's center on the xy axis with the center of the top branch on
the xy axis.
Align
treetop's minimum on the z axis with the center of the top branch on the z
axis.
It
should look like this. Save.
Editable mesh
Converting
the treetop object to an editable mesh.
Open
the material editor and apply your M01_treetest07B.rsb texture to the treetop
object.
Apply
a UVW Map modifier followed by an Unwrap UVW modifier.
Click
edit under the parameters rollout to bring up the edit uvw window.
Select
your UVWs and using the horizontal and vertical scale buttons, resize
the UVWs
and
position them over the branch texture to the far left.
Here's
what it should look like.
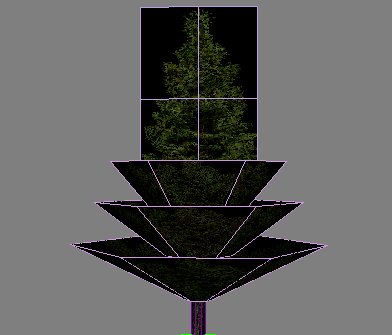
And
now your tree should look something like this.
Select the treetop object. Click the select and rotate button and
rotate the treetop object
on
the z axis 90 degrees while holding down the shift key to clone a copy of it
facing
the
other direction. The
basic model is done at this point.
If
you want to have a collision object simply create a cylinder and align
it
with
the center of your trunk on the xy axis and the minimum of your trunk
on
the z axis.
Change
the number of sides to 5 or 6 and change the height segments to 2.
The
radius is up to you but .3 is a good place to start.
Make
the height 2m.
Save.
That's
it... just tag all of your parts in the map editor, add a helper point
and
group it all together. I won't go over it again here since I've already
covered
it in the canopy tutorial.
Don't
forget, you can apply the xform modifier to create many different sized
fir
trees.
Now
you have to ask yourself one question. Are ya feelin lucky? If so,
try
the Palm Tree tutorial, coming soon!
|